Schedule Assistant is an application within Schedule Planner that students may use to search, select and enroll in their classes. Within Schedule Assistant you are able to:
- Add courses that you want to take for the semester.
- Add breaks into your schedule for work or extra-curricular activities to avoid time conflicts with your classes.
- Generate all possible schedule combinations based on your class selections, allowing you to evaluate which one will work best for you.
- Schedule travel time between classes. Perhaps you'd like 30 minutes commute-time between classes. You can schedule that through Schedule Assistant's Class Padding feature.
- "Lock" a class such that it is always on your schedule and other classes are scheduled around, given what's offered during the semester in question.
After you have selected your preferred schedule, you may add it to your Shopping Cart and proceed with registration.
Below are some introductory videos and answers to some frequently asked questions about Schedule Assistant.
INTRODUCTION
HOW TO REGISTER IN SCHEDULE ASSISTANT
Step 1. Log-in to myFSU Student Central
Open your browser, go to my.fsu.edu and enter your FSUID and Password.

Click the SC icon under MyFSU Links to go into Student Central and your Student Homepage.

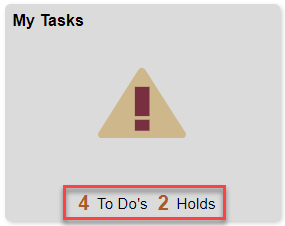
Step 2. Check and Remove any Holds
Check the My Tasks tile on your FSU Student Homepage to see if you have any holds.
Click on My Tasks for more information on your holds and how to remove them.
Clear all holds impacting registration before proceeding with Steps 3-11.
Step 3. Open Schedule Assistant
Click My Classes on your FSU Student Homepage.
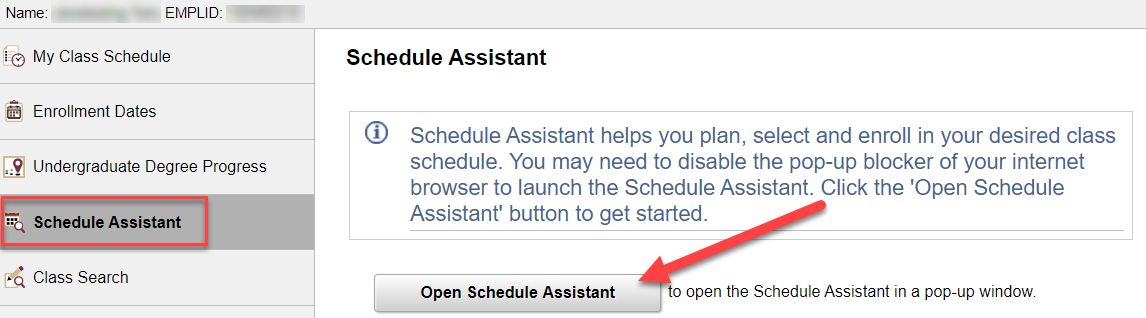
Click the link for Schedule Assistant.
Click the grey button to Open Schedule Assistant. The page will open in a new tab. If Schedule Assistant does not open, make sure the pop-up blocker on your browser is turned off and then try again.
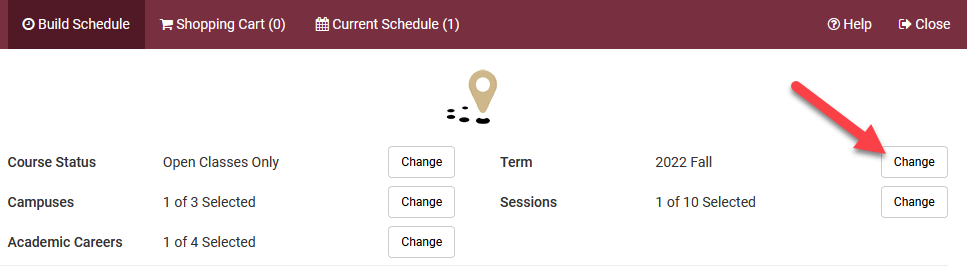
On the Build Schedule tab, select your filter values for Term, Campus, Academic Career, and Sessions.
You may change the filters at any time by clicking the Change button for each.
The Course Status filter should always be set to Open Classes Only.
Click the red +Add Course button.
Select one of the tabs to search for a course. You may use the tabs for search for courses by subject/course number, physical location or a CoreFSU/Liberal Studies area. If you already know the subject and course number, the By Subject tab would be the best tab to use.
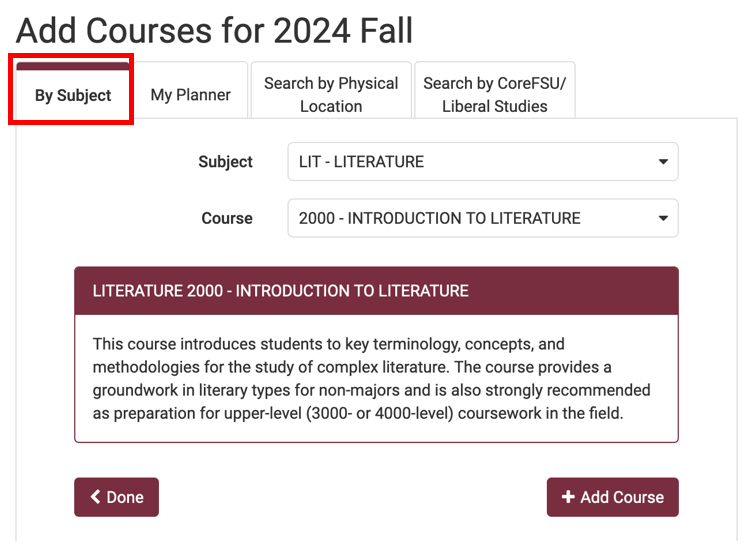
Click the +Add Course button for any course you plan to take.
Click Done when you are finished adding courses to return to the main page.
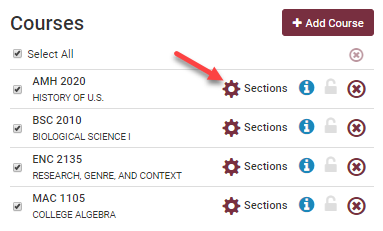
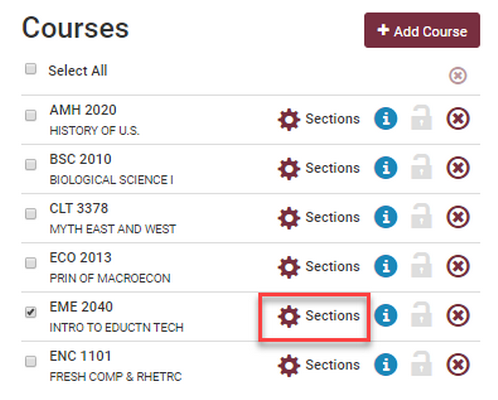
Click the Sections gear beside each course you selected to view the sections available.
Check for any sections on the list that have a Reserve Caps or Special Topic note. These sections may be reserved for students in a certain population or program, and only students in those programs will be eligible to register for these sections.
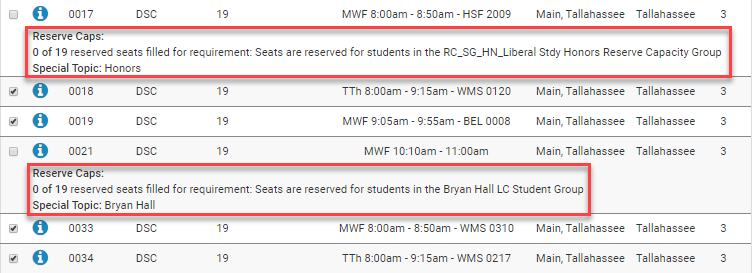
Use the check boxes on the left to deselect any section(s) that are reserved for other programs. You may also uncheck any sections that you prefer not to take.
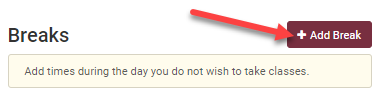
Click the +Add Break button to add a break into your schedule.
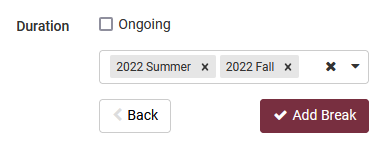
Use the break tool to block off any days and times during the week when you cannot take classes.

If you have a break that needs to extend for more than one semester, use the Duration fields to indicate how long the break should be in effect. Use the dropdown box to apply the same break to one or more specific terms. Alternately, click the Ongoing checkbox to apply the break across all current and future terms.
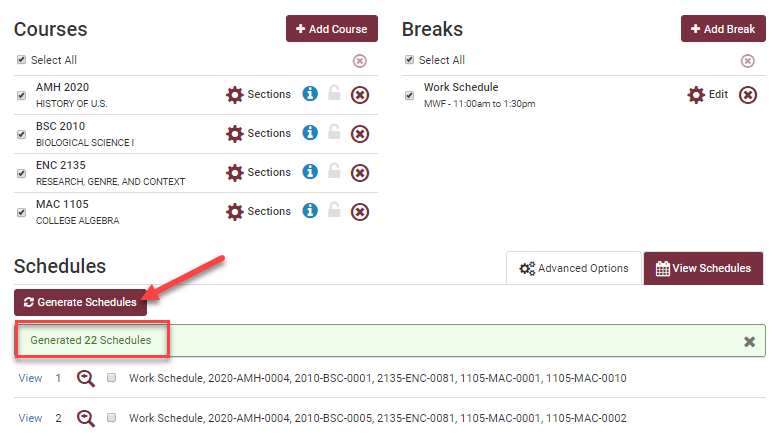
Click Generate Schedules to view all possible schedules for the classes you selected. Schedule Assistant will generate a list of all the schedule combinations possible for the courses/sections you selected and that work around your breaks.
If you have a large number of schedule combinations to choose from, consider adding a break to reduce the number of options you have to review.
If you receive an error that no schedules are possible, you will need to either modify your break times or select alternative courses.
Click the View link to review details for a specific schedule combination.

You can use the arrow buttons in the top right to look at other schedule combination options.

Step 10. Send to Shopping Cart
When you find the schedule you want to take, click the Send to Shopping Cart button.

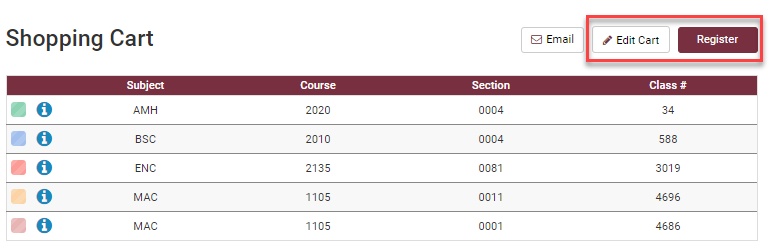
Review the classes in your Shopping Cart to ensure it is the correct schedule.
Click the Edit Cart button if you need to remove a class from the schedule.
Click the Register button to add all the classes in your Shopping Cart and finalize your registration.
A confirmation screen will appear letting you know your registration results. Your registration was successful for any classes that appear beneath the green check mark icon, and these classes will now all appear in the Current Schedule tab.
You were not able to enroll for any classes that appear beneath the red exclamation point icon. Review the red error message beneath these classes to learn why your enrollment was not successful.
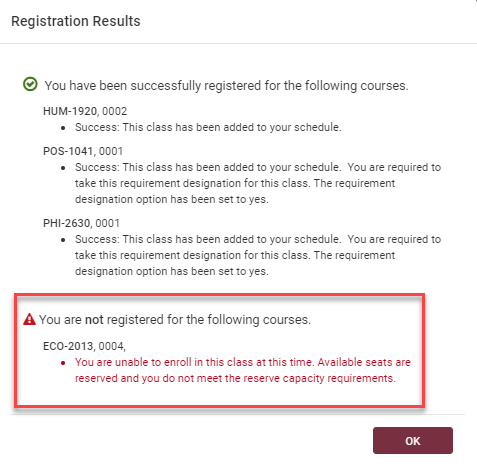
Classes you were not able to register for will remain in your Shopping Cart tab. If a section was full or reserved, go to the Shopping Cart page and remove that section from your cart. Then click Generate Schedules again to find an alternate section.
How to Swap Classes in Schedule Assistant
If you’ve registered for a class and want to change to another section or to a different course, you may use the Swap feature to make that change.
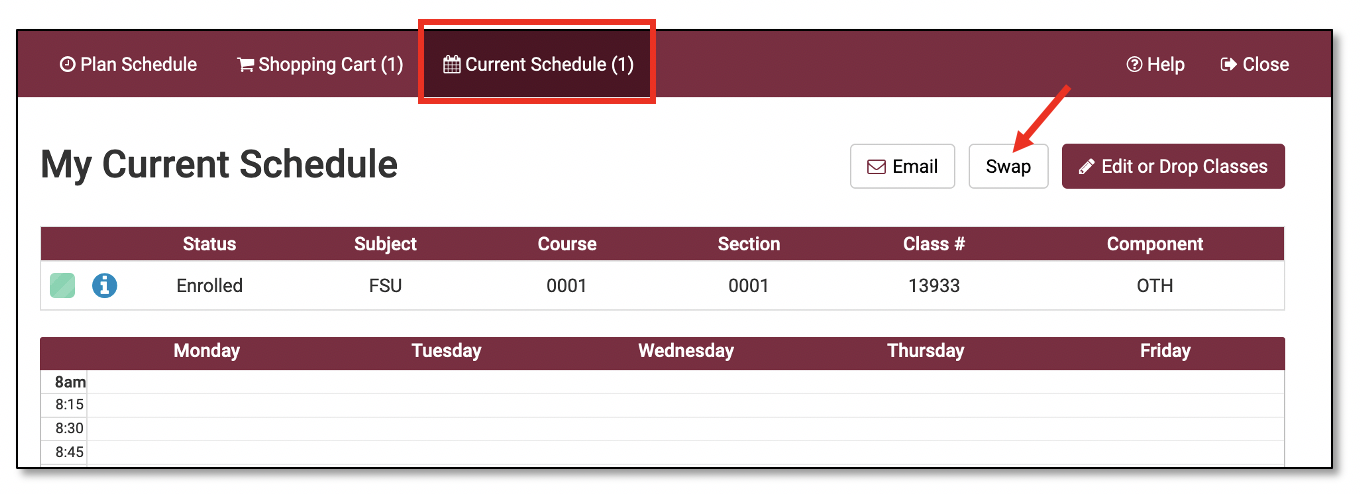
Step 1. Go to the Current Schedule Tab
On the Current Schedule tab you will find the courses you are enrolled in. Click the Swap button on the right side of the page.
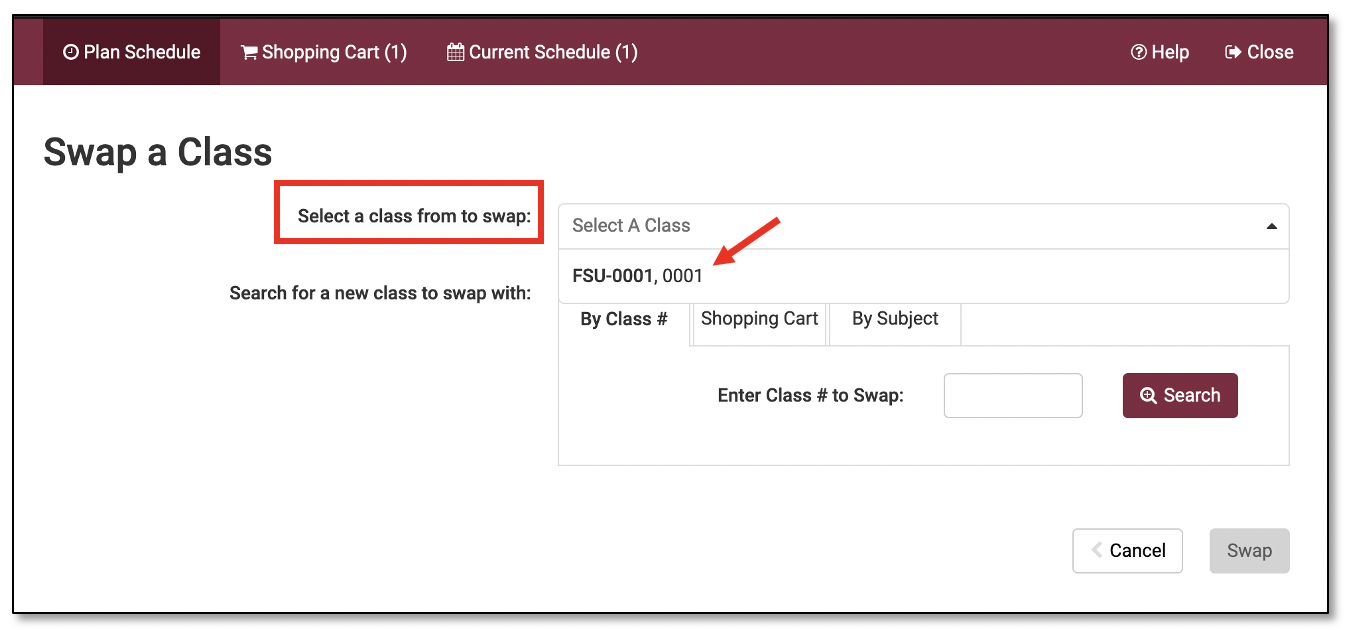
Step 2. Select a Class to Swap
The Swap a Class page will open. Click the drop down box beside the field titled Select a class from to swap. In the drop down you will find a list of all the courses you are enrolled in. Click the class you want to swap out of.
Step 3. Search for a New Class
Go down to the next area Search for a new class to swap with.
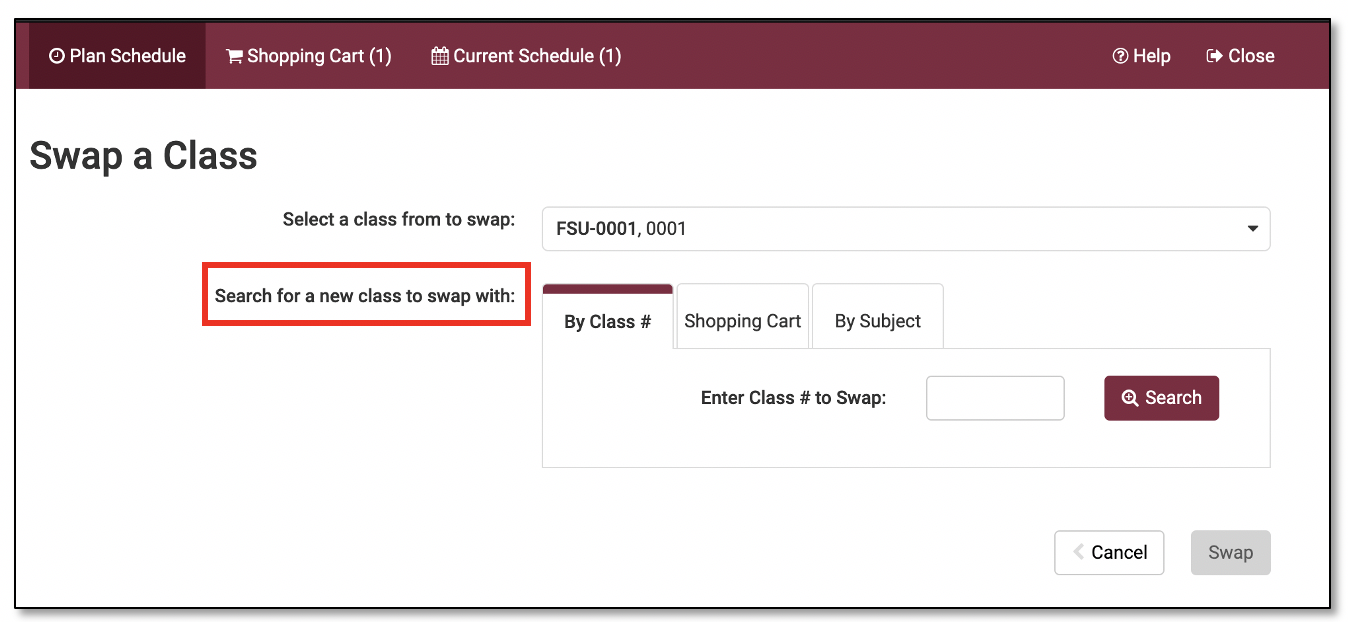
There are three tab options you may use to search for the new class you want to swap into: By Class #; Shopping Cart; or By Subject.
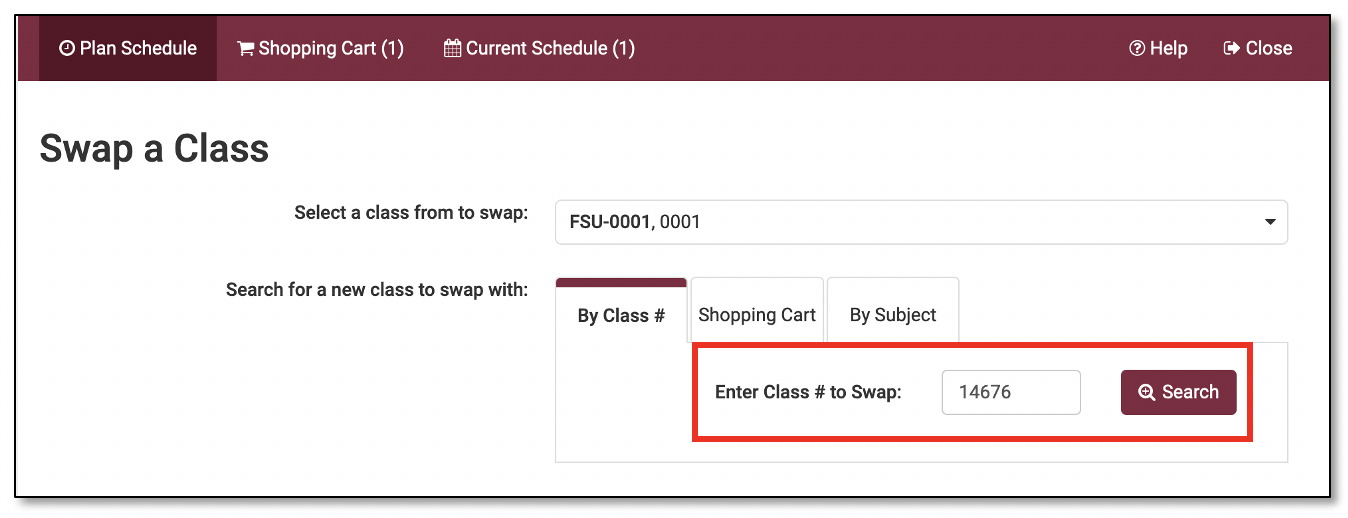
Option A: By Class#
The Class Number is a unique numeric value for a specific class section in the system for that semester. Unless you were given the class number for a course by your advisor or an instructor, use one of the other two options to search for a class instead.
The Class Number is not the course subject/prefix and number (e.g. AMH 2020). To search by subject and course number, use the By Subject option below.
If you do have the numeric class number, enter it into the space provided and click the Search button.
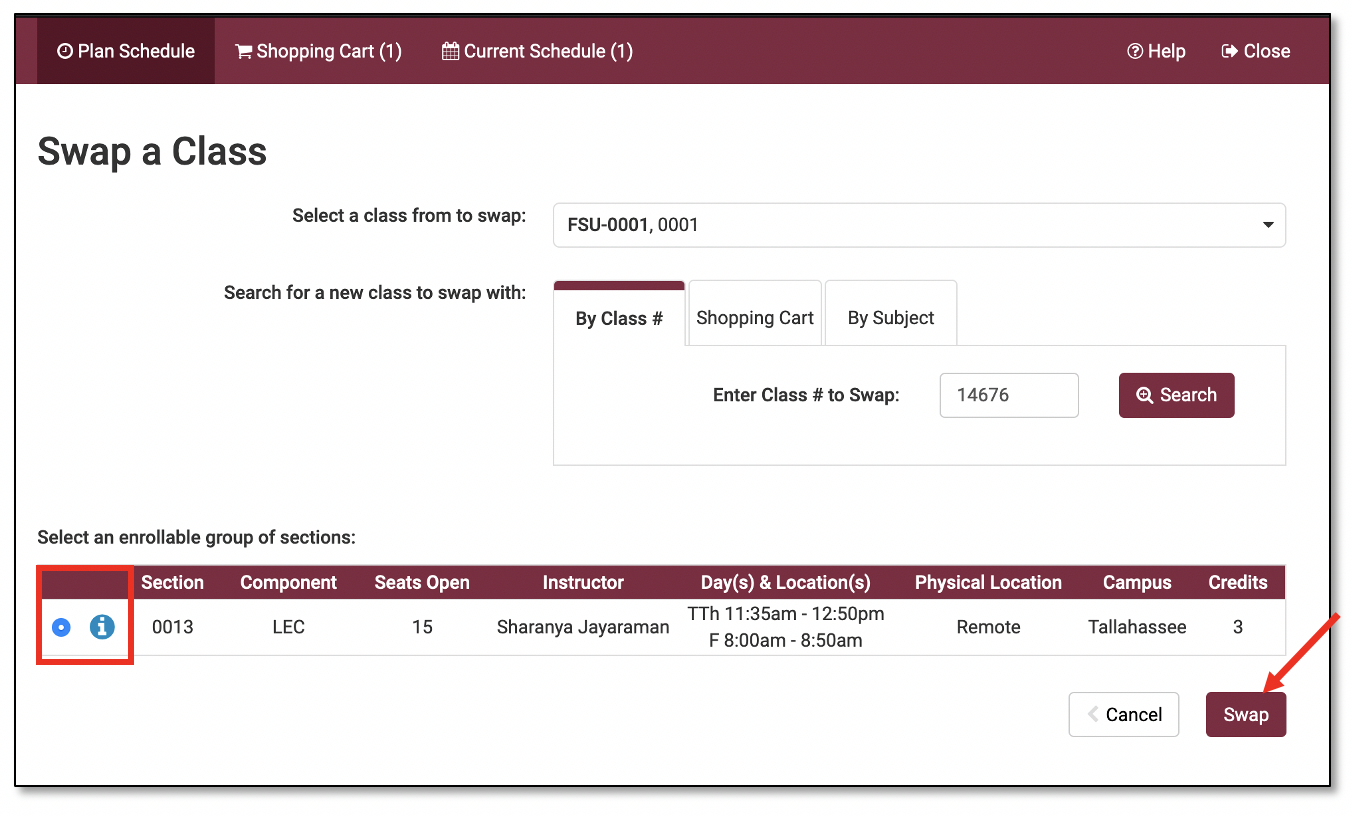
The class section will populate in the space below. Click the blue “i” icon to the left to review the section details and be sure the button on the far left has been checked.
Click the Swap button and follow the online instructions to proceed with the swap.
Option B: Shopping Cart
Use this tab if the class you want to swap into is already in your Shopping Cart.
Click the tab and select the class from your Shopping Cart that you want to swap into.
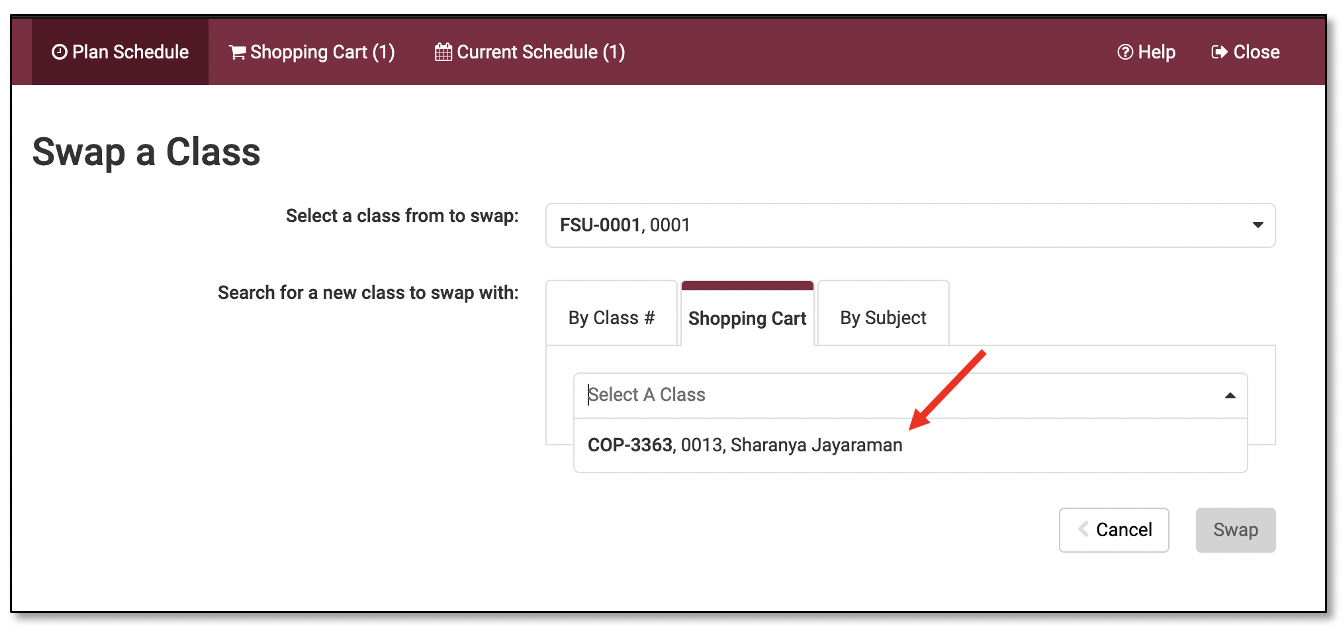
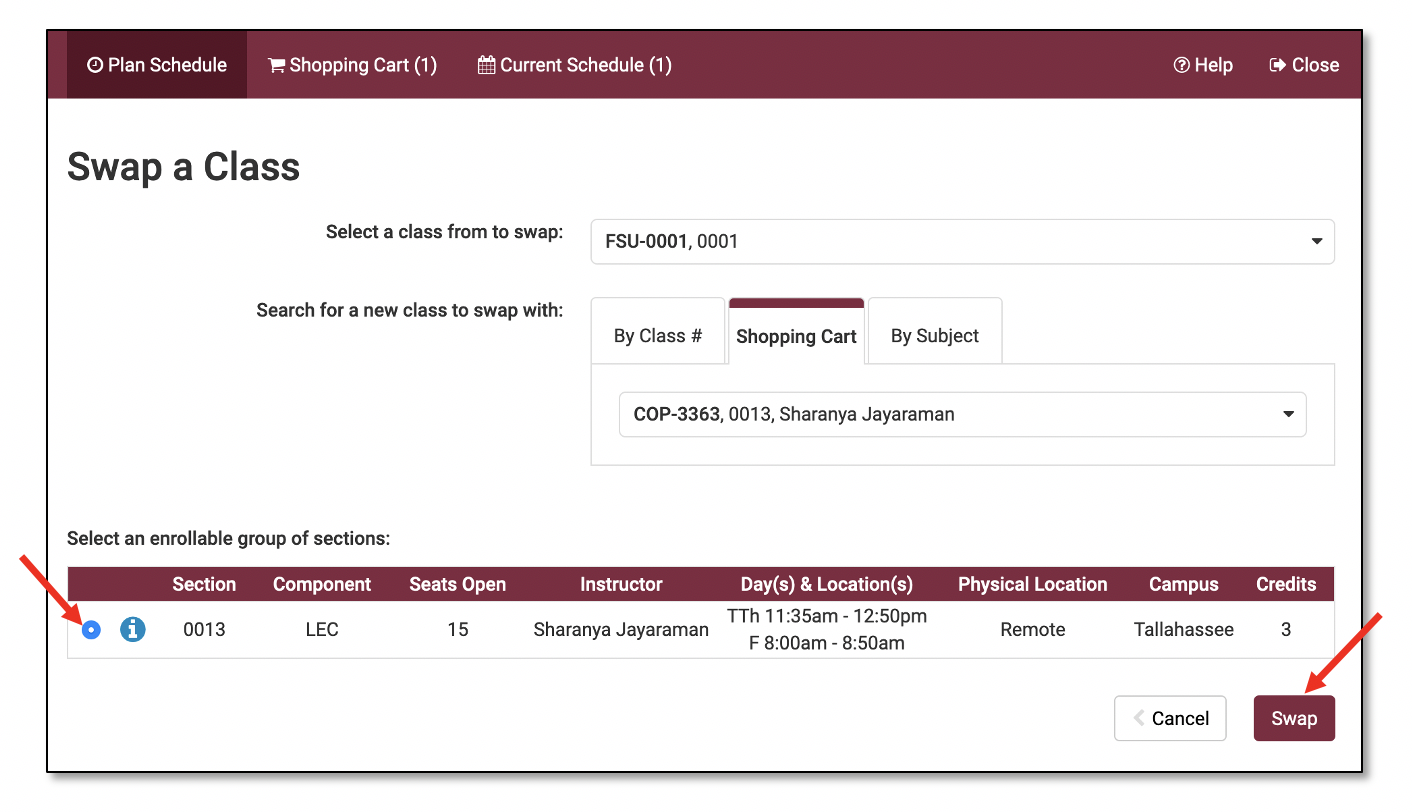
The class section will populate in the space below. Select the class by checking the button on the far left. Click the Swap button and follow the online instructions to proceed with the rest of the swap.
Option C: By Subject
Use this tab to search for a new course by course prefix and number. From the Subject and Course fields select the course prefix and then the course number.
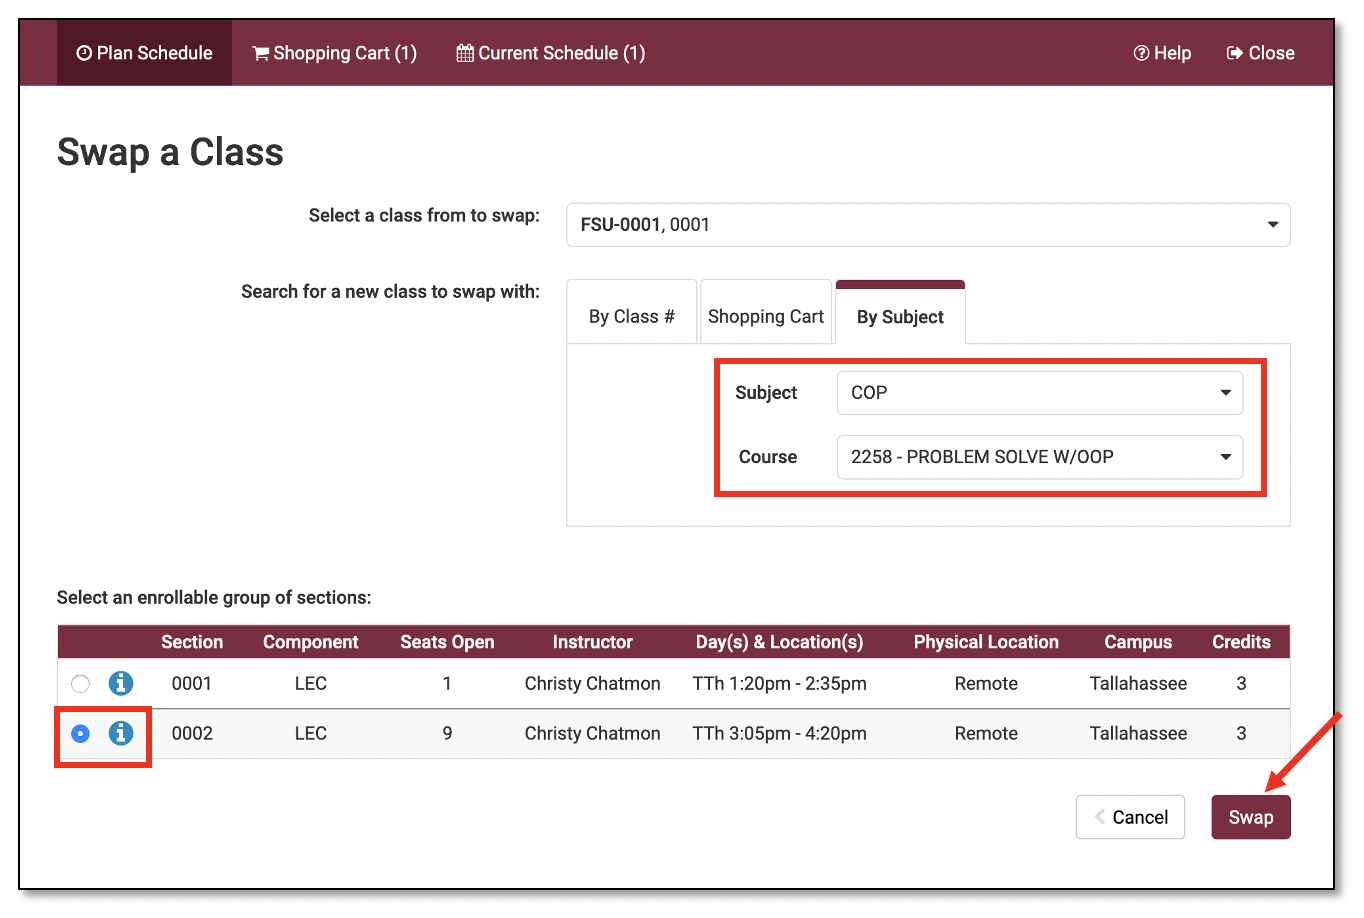
A list of sections for that course will populate in the space below.
Click the blue “i” icon to the left to review the details for each section. Be sure to check for reserve caps or section that are restricted for specific student populations.
Click the circle button deside the section you choose to swap into.
Click the Swap button and follow the online instructions to proceed with the rest of the swap.
Schedule Assistant FAQ
Does Schedule Assistant replace the way students used to register in Student Central?
No, you may register through Schedule Assistant or through Student Central. However, it is recommended that students register using Schedule Assistant to make use of the schedule optimization features that are available there.
Yes, if the course does not appear when you perform the search in Add Courses, then either all sections of the class are full (the Course Status filter should be set to Open Classes Only) or the course is not being offered in that term.
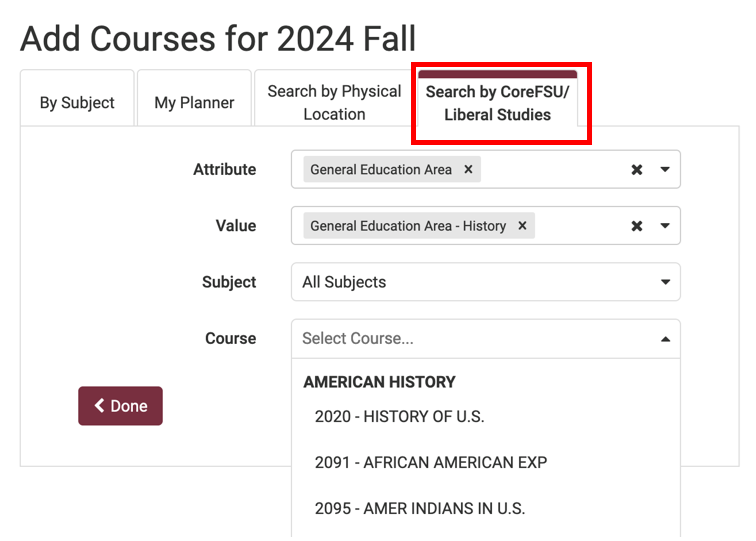
Where can I find a list of the classes offered for a specific CoreFSU/Liberal Studies area?
To search for courses by Liberal Studies area, click the Add Courses button and then select the Search by CoreFSU/Liberal Studies tab. Use dropdown fields for Attribute and Value to select the Liberal Studies area(s) you for which want to find courses.
If you know the subject area for the course you want to take, enter that value in the Subject field and then use the Course field to see the list courses available.
Alternately, you may leave the Subject blank and select the Course field to view a list of all courses offered in each subject. Select the course you decide to take from the list available and click Add Course.
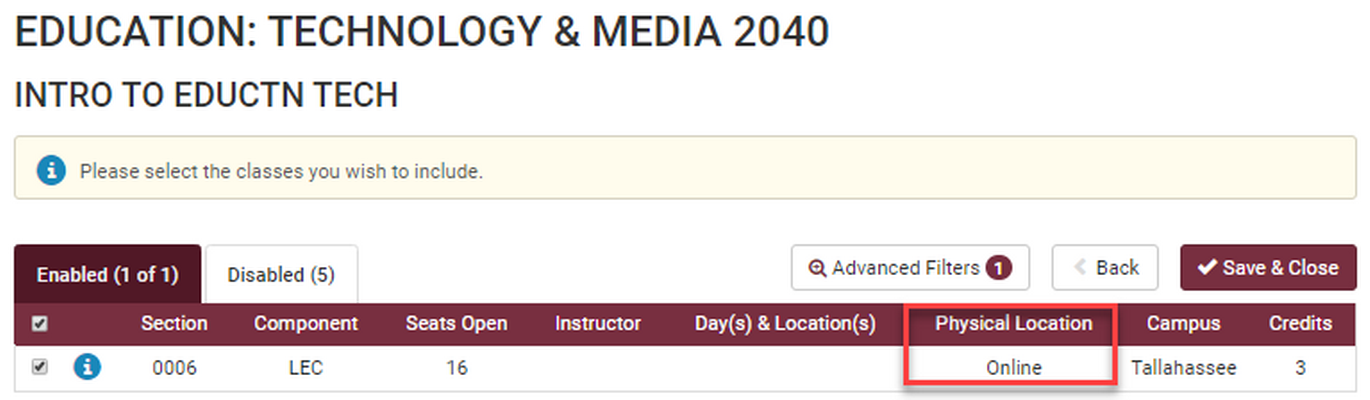
Click the Add Courses button and navigate to the Search by Physical Location tab. In the Attribute field enter Physical Location and in the Value field enter the physical location for the classes you want to take. Search for the course by subject and course number/title and add the course(s).
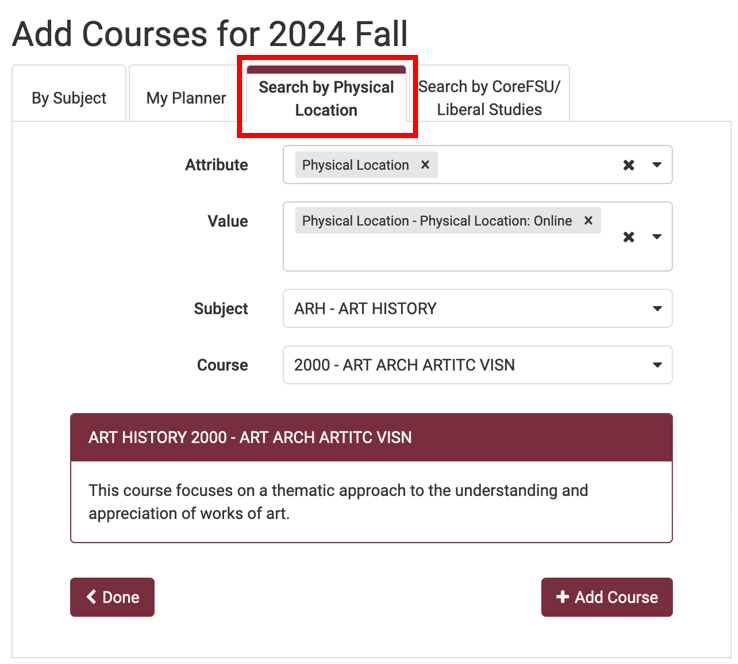
Once you have added all courses, they will appear under the Courses area of the main page. Click the Sections button.
The only sections that will appear in the results are the ones that match the location that you selected in the Physical Location tab. All sections in other locations will be Disabled. Click Save & Close and continue with Generating Schedule options and registration.
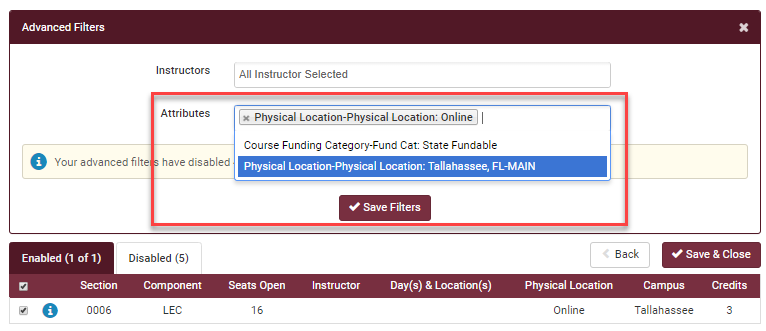
If you need to change the physical location to find other sections, click the Advanced Filters button. You may change the values in the Attributes box to add/remove other locations for the course for that semester. Click Save Filters and continue with registration.
Where can I see a list of all of the course Subjects and what they mean?
An alphabetical listing of the course subjects and their definitions is available in the Undergraduate General Bulletin. This list also includes the departments/programs that offer courses in that subject.
How do I register for a Freshman Interest Group (FIG) in Schedule Assistant?
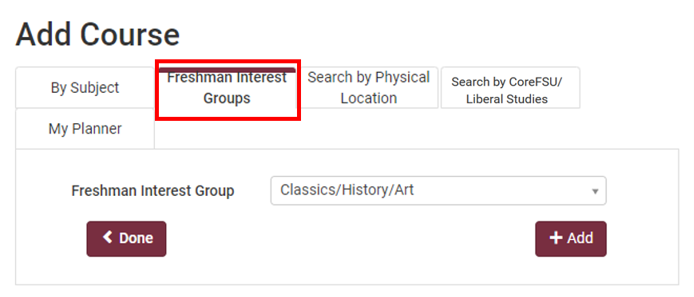
For incoming freshmen, a Freshman Interest Groups tab will be available to you under the Add Courses function. From this tab you can scroll through the list of FIG offerings from the drop down menu, add the FIG you want to take, and proceed to register.
Note: you cannot add a FIG through the By Subject tab as it will not include all the courses in the FIG cluster. You must select the FIG from the Freshman Interest Group tab for it to include all the courses.
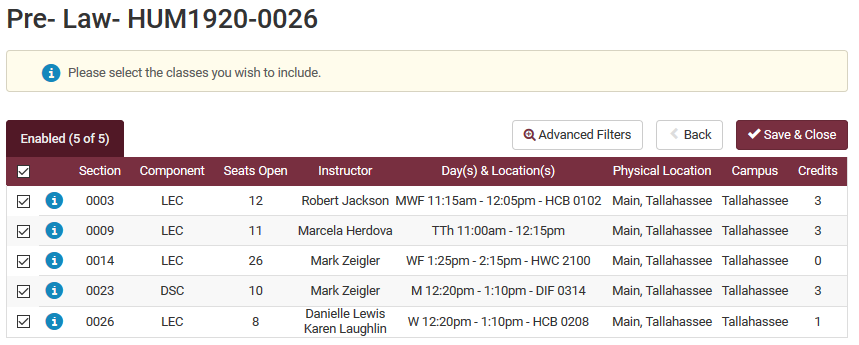
Note that when you add the FIG, only the FIG description and HUM1920 colloquium will appear in the Courses area. To see the section information for all of the courses in the FIG, click the Sections button.
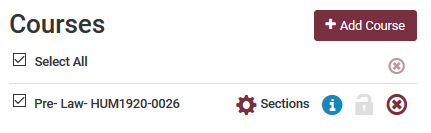
On the Sections screen you will see the section information for the courses in the FIG and can view additional details on each one by clicking the blue information icon. All sections will appear in your schedule options when you click the Generate Schedules button.
How do I make sure I have enough time between classes?
Just click the Advanced Options button to access the Class Padding drop-down box. Select from a list of five-minute intervals between 0 and 90. Do you need half an hour between classes? Select 30 minutes. (Remember, however, that most classes observe standard meeting times and already allow for 15 minutes between classes. If you add more class padding to your schedule, you might have to alter that choice if Schedule Assistant doesn't generate class schedules that work for you.)
Where can I see a map with the locations of the buildings for my classes?
Maps for the Main, Southwest, and Panama City campuses may be found at Campus Maps
An interactive FSU Campus Map is available online here.
What does “locking” a class do?
If you want to ensure that a particular section of a particular class remains on every schedule that Schedule Assistant generates, you click the Lock icon next to that class. However, remember that even if you lock a class, you still must import the schedule you select to your shopping cart to complete the enrollment process!
What if I need to drop a class after registering for it?
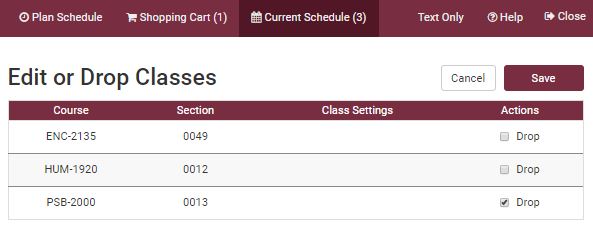
To drop a class, go to the Current Schedule tab and click the button for Edit or Drop Classes. On the next page, under the Actions column on the right check the box of the classes you wish to drop and click Save.
NOTE: You may only drop classes in Schedule Assistant while registration remains open and before the end of drop/add (midnight on the fourth day of classes). After drop/add has ended you may only request course drops with Student Central. Instructions on course drops in Student Central are available here.
How do I drop a freshman-level English Composition or Math class?
Per University policy, students may not drop English Composition (ENC1101 and ENC2135), lower-level Math classes (MGF1106, MGF1107, MAC1105, and MAC1140), or any required preparatory classes without the permission of their academic dean. For most freshmen/sophomore students, your Dean’s Office is:
Office of Undergraduate Studies
UCA 3400
(850) 644-2451